Mastering the Ultimaker 2 Build Plate for 3D Printing
Overview of Hardware/Software
In the fast-paced world of 3D printing, the build plate stands as a critical element that can significantly affect the overall printing experience. The Ultimaker 2 build plate is engineered with precision to enhance the reliability and quality of prints. This section offers a closer look at its key features, specifications, and relevance in today’s printing landscape.
Intro to the product and its key features
The Ultimaker 2 build plate is more than just a flat surface; it's designed to endure the rigors of repeated printing sessions. Constructed from high-quality glass, it provides a smooth yet adhesive surface, allowing prints to stick during the process and release cleanly once completed. The build plate features a heated component; this helps mitigate warping issues that can arise with certain materials. For enthusiasts and tech-savvy professionals, these attributes are vital for achieving superior print quality consistently.
Specifications and technical details
- Dimensions: 223 x 223 mm
- Material: Tempered glass
- Heating capability: Up to 100°C
- Compatibility: Works seamlessly with various filament types
These specs make the Ultimaker 2 build plate versatile enough to handle different materials, from PLA to ABS and beyond. Knowing these details can empower users to select the right settings based on the chosen filament, thus enhancing the final product.
Pricing and availability
The pricing for the Ultimaker 2 build plate varies depending on the region and retailer. Generally, you can expect to pay around $50 to $100. It's readily available through various platforms including specialized 3D printing stores and even larger online retailers. This accessibility ensures that tech enthusiasts can find replacement or additional build plates without hassle.
Comparison to previous versions/models
When looking back at earlier Ultimaker models, like the Ultimaker Original, it's clear to see the advancements made. The Ultimaker 2 series brought significant improvements in build plate technology. The heated glass surface is a notable update as it addresses many common printing issues seen in older versions, leading to a more reliable printing environment.
Pros and Cons
Every product comes with its own sets of strengths and weaknesses. Here’s a rundown of what users have noted about the Ultimaker 2 build plate:
Strengths
- Durability: The tempered glass withstands high temperatures and repeated use.
- Ease of cleaning: Its smooth surface allows for simple maintenance.
- Enhanced adhesion: Improved grip on prints during the process.
Weaknesses
- Price: Its cost might be higher than alternative materials available.
- Fragility during transport: Users report that care must be taken to prevent breakage.
User feedback suggests a satisfaction level that skews positively. Many appreciate the balance between cost and performance, though some caution fellow users about handling.
Performance and User Experience
Testing the performance of the Ultimaker 2 build plate yields promising results. Users noted an impressive stability of prints, leading to fewer fails during the printing process. The heated plate helps in reducing the thermal stress that often leads to warping. Moreover, the user interface for print settings is intuitive, which allows tech enthusiasts to experiment effectively.
For instance, when printing with ABS filament, many users report better results compared to using non-heated alternatives. This capability has a direct impact on productivity, minimizing downtime caused by failed prints.
Recommendations and End
Overall, it's recommended for those who value print quality and reliability. Given its specifications and user benefits, it's a worthy investment in the realm of 3D printing. Keep an eye on emerging trends and new models; the 3D printing field evolves rapidly, and staying informed ensures you're always getting the best bang for your buck.
Understanding the Ultimaker
When entering the world of 3D printing, grasping the nuances of the Ultimaker 2 is essential for anyone serious about their craft. This machine isn't just another printer; it's a gateway to creativity, innovation, and technical mastery. Understanding this device allows users to push the limits of what's achievable in additive manufacturing, thereby fostering a more productive 3D printing experience.
Overview of Ultimaker Technology
Ultimaker has made a considerable splash in the 3D printing pool, particularly with its second iteration, the Ultimaker 2. This printer embodies a blend of reliability and advanced technology that makes it suitable for both professionals and hobbyists alike. The Ultimaker 2 features precise motion control mechanisms, ensuring that every layer of filament is added with care and accuracy. This technology ensures that prints possess the required fidelity, which is particularly crucial when dealing with intricate designs or functional parts.
Moreover, Ultimaker’s open-source ecosystem gives users access to a plethora of materials and community-driven improvements. This fosters a culture of sharing ideas and solutions, which is a boon for anyone invested in 3D printing, thereby making learning curves less steep. The integration of Cura, Ultimaker's slicing software, streamlines the process from design to print, making it an essential tool in any user’s arsenal.
Specifications and Features of Ultimaker
Diving into the specifics, the Ultimaker 2 boasts a build volume of 223 x 223 x 205 mm, allowing ample space for various projects. Equipped with a heated build plate, it markedly improves adhesion, reducing the risk of warping—this is especially important when you're working with materials like ABS, which are notorious for such issues. The extruder temperature can reach up to 260 °C, enabling compatibility with a variety of filament types.
In terms of user experience, the touchscreen interface is designed for intuitiveness, allowing for easy navigation through its many settings. With layer resolution capabilities ranging from 20 to 200 microns, users have flexibility in how fine or coarse their prints can be, meeting different levels of detailed requirements.
Here are some key features that stand out:
- Dual extrusion capability allows for multi-material printing
- Automatic bed leveling which helps maintain surface flatness
- Filament detection sensor ensures that the print job doesn’t fail due to filament running out
In summary, the Ultimaker 2 isn't just a pretty face; it's built on solid, dependable technology that can live up to the demands of today's fast-paced, ever-evolving printing projects. By getting to grips with its specifications and features, users can tailor their 3D printing experience to fit their unique needs.
Significance of the Build Plate in 3D Printing
The build plate is a fundamental element in the 3D printing process, serving as the foundation on which printed parts are created. Its importance cannot be overstated, particularly in terms of print quality, material adhesion, and overall success rates. A well-functioning build plate enhances productivity and enables users to produce superior finished products, making it a key focal point for anyone using the Ultimaker 2.
When discussing the significance of the build plate, one must consider several critical aspects. First, it is the interface between the printer and the object. Any inconsistencies or deficiencies at this point can lead to a domino effect of errors throughout the printing process. Factors such as surface tension, material compatibility, and temperature uniformity must be taken into account. A better understanding of these elements facilitates optimal print settings, which can greatly influence print outcomes.
Role in Print Quality and Adherence
The quality of the initial layer of a print is vital for the success of the entire job. Strong adhesion is key because it ensures that the filament adheres properly to the surface of the build plate, preventing warping and lifting which can ruin a print. Different materials have varying adhesion properties, and the build plate must complement these effectively.
Moreover, the build plate's surface texture affects how well the printed material sticks. For example, a smoother surface may deter certain types of filaments from adhering properly, whereas a more textured surface can increase adhesion but may also leave marks on the bottom layer of the printed object.
To put it simply, a good quality build plate can lead to prints that are:
- More reliable: Consistent adhesion and stabilization during printing.
- Visually appealing: A smooth surface reduces imperfections seen on final products.
- Long-lasting: Properly adhered layers enhance durability of printed parts.
"The first layer is often regarded as the most critical element of 3D printing success. Perfecting this layer can save time and resources in the long run."
Impact on Print Success Rates
The relationship between build plate quality and print success rates is direct and significant. A poorly maintained or insufficiently chosen build plate significantly hikes the chances of print failure. Issues such as filament curling, misalignment, or even outright prints failing to stick can arise from a sub-par build plate setup.
Some factors that contribute to print success rates include:
- Heating consistency: For those utilizing heated build plates, it's crucial that uniform heating is maintained. Fluctuations can cause different sides of the print to cool unevenly.
- Surface compatibility: Certain filaments perform better with specific build plate materials. For instance, PLA might not adhere well on a glass surface unless treated, while ABS prefers an enclosed, warmed build environment to mitigate warping.
- Maintenance frequency: Regular cleaning and replacing parts of a build plate promote the longevity and quality of prints.
Incorporating these elements not only enhances printing reliability but also builds a foundation for innovative designs and complex geometries, which is often the goal for IT professionals and tech enthusiasts alike.
Understanding the significance of the build plate, its role in maintaining quality, and its contribution to success rates can ultimately lead to more effective and efficient print operations in 3D printing.
Material Composition of the Ultimaker Build Plate
Understanding the material composition of the Ultimaker 2 build plate is critical for 3D printing success. It's not just a flat surface where filament lies; the build plate plays a significant role in how well prints adhere, the ease of part removal, and the overall durability of each print job. By carefully considering the material used in the build plate, users can make informed decisions that align with their printing needs and the characteristics of the materials they plan to use.
Glass vs. Aluminum Build Plates
When it comes to choosing between glass and aluminum for the build plate, both materials have their unique set of advantages and drawbacks. Glass build plates are widely cherished for their smooth surface, which allows for detailed prints without much fuss. They can endure high-temperatures and often provide a level of flatness that ensures consistent first layers. Additionally, prints typically adhere well to the glass but can be removed with little hassle once cooled, owing to the temperature differential. However, glass plates can be more fragile compared to aluminum, making them prone to chipping or breaking if not handled carefully.
On the flip side, aluminum build plates are renowned for their strength and durability. They can handle a fair amount of thermal stress and are less likely to warp over time. One of the notable features of aluminum plates is their ability to have heated variants, which will be discussed further below. While the aluminum surface can sometimes have a rougher texture, leading to adhesion issues with certain filaments, many users find complementing materials, such as adhesive sprays, to be effective in addressing this concern.
"The choice between aluminum and glass isn’t merely about preference; it’s about understanding how each material interacts with different filament specifications and printing conditions."
Heated vs. Non-Heated Options
The heated versus non-heated battle is another pivotal consideration when assessing the Ultimaker 2 build plate. A heated build plate serves to keep the printed material warm, thus reducing warping and improving layer adhesion. This is especially advantageous when working with materials such as ABS or nylon, which can be notoriously difficult to print without some form of heat support. Essentially, a heated plate allows for a wider range of materials to be effectively used, expanding the possibilities for creative 3D projects.
Conversely, a non-heated build plate may be more suitable for simpler materials like PLA. For these filaments, the adhesion may still be adequate without the added heat since they’re less prone to warping. However, some users might find that prints are far more susceptible to detaching from the plate’s surface as the material cools down. If choosing a non-heated option, it's advisable to apply adhesive materials or utilize special build surfaces that enhance adhesion for better results.
In summary, whether you go with glass or aluminum, heated or non-heated, understanding the material properties of the build plate can greatly enhance your printing experience. A proper match between the build plate type and the filament used can lead to smoother operations and higher-quality prints.
Installing the Build Plate
Installing the build plate on the Ultimaker 2 is not merely a task; it is a crucial step that can ultimately dictate the success of your 3D printing endeavors. Without the proper installation of the build plate, prints can easily fail, leading to wasted materials and time. This section will delve into the necessary preparations and the actual installation process, ensuring a seamless setup.
Preparing the Printer for Installation
Before even thinking about the installation process, it’s important to prepare the printer adequately. This involves several steps:
- Turn Off and Unplug the Printer: Safety first. Make sure the printer is powered down and disconnected from any electrical sources to prevent accidents while working.
- Remove Existing Build Plate: If there's already a build plate installed, you'll need to take it off. This usually involves unscrewing it from the printer bed and gently lifting it off. Take care not to damage any connectors in the process.
- Inspect Relevant Components: Take a moment to check for any wear and tear on the printer's components. This includes the print head and the bed itself. Any dirt or debris should be cleaned away so that nothing interferes with the new install.
- Gather Necessary Tools: Having the right tools handy can make your life easier. Depending on your model, you might need a screwdriver, pliers, and maybe even a soft cloth for cleaning.
Ensuring these steps are thorough can save a world of worry later on during the print.
Step-by-Step Installation Process
Once everything is prepped, it’s time to roll up your sleeves and get to the meat of the matter. The installation itself is pretty straightforward but requires patience and precision:
- Position the New Build Plate: Start by placing the new build plate carefully in the designated spot on the printer. Ensure that everything aligns well to avoid any misalignment during printing.
- Secure the Plate with Screws: Depending on your Ultimaker 2 model, there will usually be four screws that you need to tighten. Use your screwdriver to fasten them securely, but don’t over-tighten, as it can lead to cracking the plate.
- Reconnect Any Electrical Connectors: If your build plate is equipped with any electrical connectors, double-check that they are fastened correctly. A loose connection can lead to issues during the heating phase of the print.
- Level the Build Plate: Once installed, leveling is next on the agenda. Most printers have a built-in leveling function. If your machine doesn't, place a piece of paper between the nozzle and the plate to adjust it manually until there's just a slight resistance.
- Run a Test Print: Finally, initiate a small test print to ensure that everything is functioning as it should. This not only verifies the installation but also gives you peace of mind that your print bed is correctly set up.
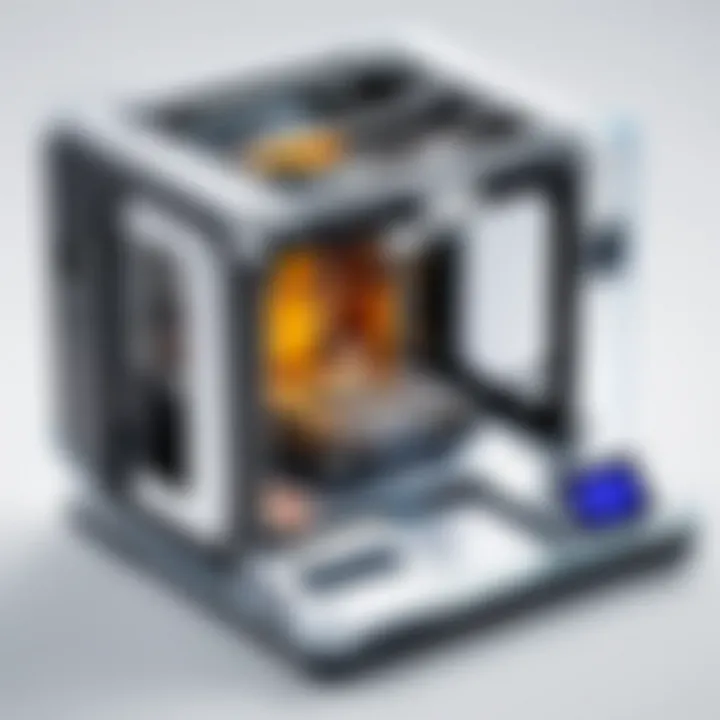
Remember: A well-installed build plate lays the groundwork for successful prints, avoiding common pitfalls like warping and adhesion issues.
Following these steps ensures not only a successful installation but sets the stage for future projects. Taking the time upfront can save you headaches down the line when creating intricate designs with your Ultimaker 2.
Best Practices for Using the Build Plate
When it comes to the Ultimaker 2 build plate, mastering best practices is crucial. A well-maintained and wisely used build plate paves the way for successful prints, minimizing frustration and maximizing quality. Essentially, a few key considerations can make the difference between a print that emerges flawlessly and one that results in a tangled mess of filament. So, let’s dive into some fundamental aspects that ensure optimal usage of the build plate.
Optimal Printing Temperatures
Temperature control plays a vital role in the success of any 3D print. Each type of filament has its own sweet spot when it comes to temperature, and knowing these parameters is half the battle won. Generally, the Ultimaker 2 lets you set the extruder and bed temperatures according to the material being used.
- PLA filament usually requires a nozzle temperature of around 190°C-220°C and a bed temperature of 50°C-60°C. This is ideal for ensuring a good bond without excessive warping.
- For ABS, on the other hand, you may want to push the nozzle up to 220°C-250°C and set the bed at around 90°C-110°C. This higher temperature helps combat the notorious shrinking issues seen with ABS.
- PETG has a recommended nozzle temp of 220°C-250°C and a heated bed temperature around 70°C-80°C. Reaching the right specifics helps with adhesion and reduces the chance of prints failing due to lift-off.
Failure to adapt printing temperatures can result in poor adhesion, problems with warping, or even clogs in the nozzle. It’s advisable to consult the filament manufacturer's guidelines to fine-tune these settings. Overall, being cautious and aware of these specifications significantly enhances print quality.
Choosing the Right Build Surface Material
The choice of build surface material can determine not only the quality of prints but also their success rates. Different filaments behave differently with surface materials, and this choice should be informed by both the type of filament and the desired print outcomes.
Some common options include:
- Glass Surface: Offers a very smooth finish and excellent adhesion, especially for materials like PLA. It's often favored by users because of its thermal properties and easy cleaning options.
- Blue Painter’s Tape: Economical and effective, it creates good surface energy for materials like PLA while also being easy to replace when worn out.
- PEI (Polyetherimide): Known for its robustness, PEI surfaces provide excellent adhesion for nearly all types of filaments without any additional adhesives needed.
- BuildTak: This surface material is an excellent durable choice, mostly used for high-temperature materials like ABS and Nylon. It holds parts down well but requires some maintenance.
When selecting a build surface, consider the longevity and the trade-offs between adhesion and removal ease. For instance, a smoother surface generally requires lower adhesion, but it can be cumbersome when needing to remove the print. Each user's setup is unique, so experimenting with a small sample of materials can lead to optimal results.
"The right surface on the build plate is like finding the right pair of shoes; it’s essential for that perfect fit!"
In summary, understanding optimal printing temperatures and choosing the right surface material are pivotal best practices in 3D printing with the Ultimaker 2 build plate. These practices form a strong foundation for producing successful and high-quality prints, meeting the demands of even the most discerning tech enthusiasts. By embedding these tips into your printing routine, you’ll surely streamline operations and elevate your 3D printing game.
Troubleshooting Common Build Plate Issues
When stepping into the realm of 3D printing, especially when dealing with the Ultimaker 2, being able to troubleshoot common build plate issues can save users time and resources. Understanding these challenges not only enhances the overall printing experience but also ensures that the investments in the printer and materials yield the best results. The two predominant issues that often arise—warpage and filament adhesion—can lead to significant setbacks, which is why having practical solutions at hand is almost a non-negotiable necessity for any user.
Warpage and Deformation Problems
Warpage and deformation can rear their ugly heads at any stage of the printing process. These issues generally stem from temperature fluctuations or material stresses during the cooling phase. For instance, if the printer's ambient temperature varies too much or if the build plate is not adequately prepped, users may find their prints curling up like a poorly rolled burrito.
It's important to note that different materials behave uniquely under various temperature conditions. For instance, ABS (Acrylonitrile Butadiene Styrene) tends to warp more compared to PLA (Polylactic Acid) when the conditions are not just right. Users often find themselves wrestling with the right parameters. Here’s a quick checklist to minimize warpage:
- Ensure the Build Plate is Level: An unlevel surface can create inconsistencies in print height, leading to warpage.
- Use a Heated Bed: This can help keep the entire print warm, reducing the chances of curling.
- Clean the Build Surface: An oily surface won’t provide the necessary grip that many materials need.
- Consider Using Brims or Rafts: These can provide extra stability during the initial layers of printing.
"Addressing warpage early can prevent a plethora of headaches down the line, making a preemptive approach worth its weight in gold."
Poor Adhesion of Filament
Another common pitfall is the poor adhesion of filament to the build plate. This typically results in prints lifting off the surface during the printing process, leading to failed projects and wasted materials. Two main culprits tend to be responsible for adhesion issues: surface preparation and environmental factors.
For many users, building the perfect sandwich of surface prep can feel daunting. But fret not, because addressing this can lead to shiny prints and, more importantly, save a ton of time. Here’s how:
- Choose the Right Surface Material: Different materials stick better to different surfaces. For example, using a glass surface is often favored for its smooth finish.
- Cleanliness is Key: Any contaminants like fingerprints or dust can inhibit adhesion. Regular cleaning with isopropyl alcohol can help maintain a pristine surface.
- Calibrate Printing Temperatures: An optimal temperature not only helps with printing but also keeps the first layer firmly attached to the build plate.
- Experiment with Adhesives: Some users find that using a glue stick or specialty adhesives can enhance adhesion as well.
Ultimately, the ability to troubleshoot these common issues is crucial not just for ensuring that prints come out right but also for understanding how nuanced the 3D printing process can be. Navigating problems related to warpage and poor filament adhesion will not only refine the quality of the output but also enrich the user’s overall experience.
Maintaining the Ultimaker Build Plate
Keeping the Ultimaker 2 build plate in peak condition isn’t just about extending its life; it’s about ensuring that every print comes out just right. A well-maintained build plate directly influences print quality, adherence, and reliability. Just as you wouldn’t let your car run on empty, ignoring basic upkeep can lead to subpar prints and a frustrating printing experience. Regular maintenance not only helps avoid issues but also optimizes the overall performance of your 3D printer.
Regular Cleaning Techniques
To maintain the effectiveness of your build plate, regular cleaning is essential. The build plate can accumulate dust, grease, and residue from printed materials, all of which can cause adhesion problems. Here are some recommended cleaning techniques:
- Use Isopropyl Alcohol: A soft cloth moistened with isopropyl alcohol is often enough to clear away most contaminants. Gently wipe the surface in circular motions. This helps to avoid scratching while ensuring a clean area for the next print.
- Glass or Aluminum-Specific Cleaners: If your build plate is made of glass or aluminum, you can utilize cleaners specifically designed for those materials. They will help maintain the quality and clarity of the surface.
- Avoid Abrasive Materials: Stay away from steel wool or similar products when cleaning. These can scratch the surface and create micro-dents that impact prints.
- Preventative Measures: Before printing, ensure there's no previous filament residue. Take a quick look and lightly wipe the surface with a clean cloth—sometimes, it just takes a moment of effort to save a whole lot of trouble.
When to Replace the Build Plate
Even the most durable build plates will wear down over time. Knowing when to replace your Ultimaker 2 build plate can save you from headaches later on. Here are some indications:
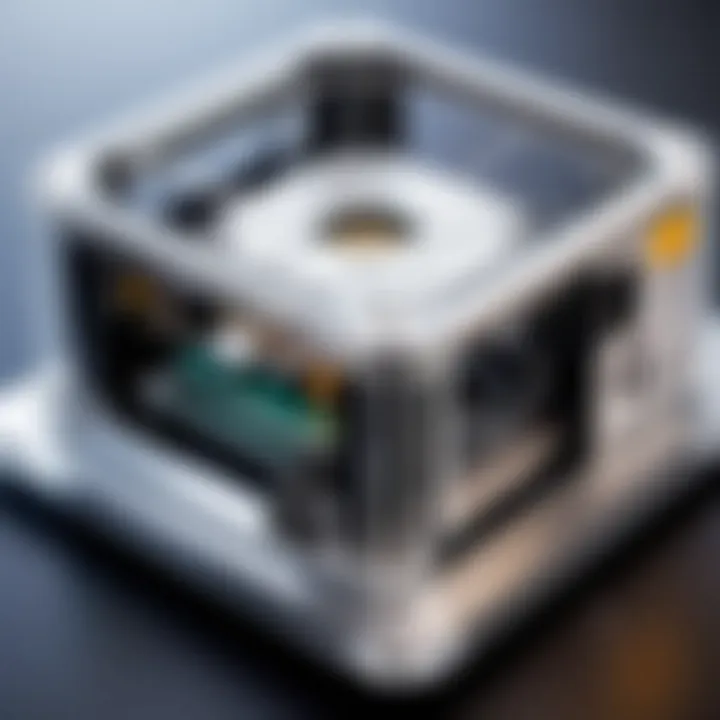
- Visible Damage: If you notice cracks or significant scratches on the surface, it's time to consider a replacement. Damage can affect adhesion, leading to potential print failures.
- Persistent Adhesion Problems: If you've been adjusting your settings while cleaning regularly but still find that prints aren’t adhering as they should, it might not be you—it could be the build plate.
- Warping: A warped build plate is a definite no-go. Warping disrupts the levelness needed for a reliable print. If it’s no longer flat, the quality of your prints will take a nosedive.
- Age and Usage: Consider how often you've printed. Continuous use can wear out materials faster than expected. Set a schedule for replacing parts based on your printing volume.
"Maintaining your build plate is crucial for both print quality and longevity. Ignoring it can lead to mounting problems down the line."
Like a good automobile, routine maintenance of the Ultimaker 2 build plate can go a long way in ensuring smooth operations and impressive outcomes. By staying proactive in cleaning and replacing the plate when necessary, you open the door for success in your 3D printing endeavors.
Comparative Analysis with Other Build Plates
When evaluating the Ultimaker 2 build plate, it is crucial to consider how it stacks up against alternatives available on the market. The comparative analysis of build plates not only sheds light on specific strengths and weaknesses of the Ultimaker model but also provides valuable insights into how different materials and technologies can impact the user experience in 3D printing. This analysis aids IT professionals and tech enthusiasts in making informed decisions, ensuring that they select the build plate that best fits their printing needs.
Comparing Material Durability
Material durability is a central factor in determining the performance and lifespan of a build plate. The Ultimaker 2 build plate, primarily made of glass, exhibits commendable strength against scratches and thermal stress. Glass plates are known for their rigidity and smooth surface, which helps achieve excellent first-layer adhesion. However, the downside is their potential to crack under excessive heat or impact.
When we compare this with aluminum build plates, we notice several differences. Aluminum is lighter and more resistant to warping than glass, which can elongate the life of the platform in environments subject to temperature fluctuations. Yet, aluminum's ability to hold heat may create challenges for certain prints, such as those requiring a gradual cooling process.
To delve deeper into durability, one should consider the surface treatment. Some users opt for PEI films on aluminum plates, enhancing adhesion and limiting wear. This leads to more robust material performance over time but requires regular maintenance to avoid degradation.
In context, here are some key points to consider:
- Glass Plates: Durable against scratches, smooth surface. Prone to cracking.
- Aluminum Plates: Light and warp-resistant. Potential issues with heat retention.
- PEI Coated Aluminum: Enhanced adhesion but needs regular upkeep.
Cost-Effectiveness and Longevity
Cost-effectiveness is often a deciding factor when investing in 3D printing equipment. The Ultimaker 2 build plate, while of high quality, can come at a premium price compared to other materials like bare aluminum or budget glass options. However, considering longevity can tilt the balance in favor of the Ultimaker 2.
For instance, an aluminum plate might be less expensive on the upfront but can wear down faster under heavy use or frequent heating cycles, leading to eventual replacement costs. In contrast, a quality glass build plate from Ultimaker, despite its higher initial expense, may last considerably longer, offering better return on investment in the long run.
Here are several points regarding cost-effectiveness and longevity:
- Initial Costs: Ultimaker plates may be pricier than alternatives.
- Replacement Cycle: Cheaper plates may require frequent replacements.
- Performance Over Time: Ultimaker plates often outperform cheaper materials, especially in demanding applications.
In summary, it is not merely about the initial cost but considering how each option holds up with use and its influence on the overall print quality, maintenance time, and operational efficiency.
Ultimately, understanding these comparative aspects empowers users to choose the most suitable build plate for their specific applications. This knowledge can lead to optimized 3D printing results, reduced costs, and improved user experiences, making it a pivotal discussion for anyone in the field.
User Experiences and Testimonials
User experiences and testimonials are among the most valuable assets for anyone delving into 3D printing, especially regarding the Ultimaker 2 build plate. The insights gained from actual users provide a perspective that can’t simply be outlined in technical manuals. These testimonials offer a glimpse into the practical applications, challenges, and successes that come with utilizing the Ultimaker 2 build plate in varied environments.
Case Studies from IT Professionals
IT professionals frequently engage in projects that require precision and reliability. Their feedback can highlight how the Ultimaker 2 performs under various conditions. For instance, one IT engineer tasked with prototyping complex mechanical parts noted how the build plate's surface helped with adhesion throughout long prints, which was critical for ensuring accuracy.
Another case mentioned involved an IT consultant utilizing the Ultimaker 2 for educational purposes. In that setting, ease of use and the ability to achieve consistent results over multiple prints were emphasized. Despite initial hesitations regarding the build plate’s material—some preferring glass for its smoothness—this user found it easy to navigate and adjust to different materials. They stated, "Once you learn the quirks, it feels like you can truly trust the machine."
Common Feedback from the 3D Printing Community
The 3D printing community is often a bustling hub of information, where users freely share their experiences. A recurring theme is the robustness of the Ultimaker 2 build plate in comparison to competitors. Many users highlight that its durability often leads to fewer replacements—a significant consideration for heavy users.
Additionally, numerous forum threads discuss the impact of temperature settings on print success. Many users have pointed out that optimizing the heater settings on the build plate can reduce warping and improve adhesion. One community member mentioned that after adjusting the temperature to better suit the filament type, the outcomes drastically improved: "It was a game changer for my prints, taking the guesswork out of the equation."
User feedback also reveals a collective appreciation for the build plate's ability to adapt to various printing materials. Comments on platforms like Reddit emphasize the versatility it provides, allowing users to switch materials with confidence instead of being worried continuously about print failure.
With a wealth of testimonials and real-world examples, it's evident that understanding user experiences adds depth to any exploration of the Ultimaker 2 build plate. Not only do these accounts showcase the device's strengths, but they also offer valuable lessons and tips that can help new users get up and running smoothly.
Future Innovations in Build Plate Technology
The terrain of 3D printing technology is always evolving, with build plates at the heart of this progression. Innovations in build plate technology are not just about improving efficiency; they hold the key to unlocking new possibilities in terms of material diversity, precision, and user experience. As the industry increasingly embraces advanced materials and techniques, understanding these advancements that future build plates might bring can be the difference between a mediocre print job and an exceptional one.
Emerging Materials and Technologies
The next wave of 3D printing will likely focus on materials that enhance durability and precision for build plates. For instance, developments in composite materials could lead to plates that are significantly lighter yet just as sturdy. This means that as printers advance, the need for additional support structures might become obsolete, leading to smoother prints with improved adherence.
There's also interest in utilizing materials infused with heating elements. Imagine a build plate that warms itself automatically to prevent common issues such as warping or detachment during the printing process. With this technology, users could potentially set their machines and forget about them until printing is complete, creating a frictionless experience that allows for more creative potential.
Additionally, companies are experimenting with surface coatings that adapt to the type of filament used. Rather than switching out build plates for different materials, a next-generation plate could adjust itself to provide optimal adhesion across various filament types like PLA, ABS, or PETG, eliminating trial and error for users. Such advancements could greatly benefit tech enthusiasts, allowing them to focus on design rather than dealing with technical hiccups.
Trends to Watch in 3D Printing
- Adaptive Build Plates: The innovation around build plates is not just in materials, but in intelligent design. Future models could feature technology that analyzes the printing job and applies specific adjustments in real-time. If a print starts showing signs of lifting, the plate could automatically adjust temperature or surface friction.
- Integration with AI: As artificial intelligence becomes more embedded in everyday technology, its incorporation into 3D printing is highly anticipated. AI could assist with calibrating build plate settings based on learned user preferences or past print successes, optimizing the 3D printing process even further.
- Sustainability: There's a growing movement towards eco-friendly materials in all technology sectors, including 3D printing. Future innovations might produce build plates from biodegradable or recycled materials, addressing the environmental concerns surrounding plastic waste in the industry.
- Enhanced Monitoring Systems: With cameras and sensors becoming cheaper, the integration of live monitoring systems on build plates is set to enhance user engagement. Users could receive real-time updates directly to their smartphones, alerting them to issues or allowing for mid-job adjustments without even being in the same room.
- Interconnectivity: As the Internet of Things (IoT) continues to grow, the ability for build plates and 3D printers to communicate with other devices will likely evolve. Imagine a home or office printing hub where multiple printers share data regarding job times, filament levels, and performance history - all managed through a central application.
"The future of 3D printing is not just about making things; it's about making things better, smarter, and more sustainable."
In summary, the future of build plate technology is rich with possibilities. Innovations in materials and trends are poised to revolutionize how we interact with 3D printing. Among IT professionals and tech enthusiasts, staying abreast of these developments is crucial, as they promise to transform the landscape of 3D printing into an arena of limitless creative expression.


